The minutes immediately following a motor vehicle accident are marked by stress, adrenaline, and uncertainty. Whether you have experienced a minor fender bender or a major highway impact, the choices you make on the side of the road set the trajectory for your vehicle’s entire recovery process. Most drivers focus entirely on immediate safety and basic insurance exchanges, leaving the logistics of vehicle transport, storage, and teardown to whoever arrives on the scene first.
Unfortunately, missteps at the crash site are the single leading cause of administrative holds, hidden mechanical damage, insurance disputes, and weeks of unnecessary repair delays. Allowing an unverified tow operator to haul your vehicle to an unknown storage yard can easily add thousands of dollars in daily fees and stall your claim before a technician ever turns a wrench.
Taking control of the post-collision workflow requires a clear, actionable plan. By managing scene safety, overseeing specialized transport, avoiding holding yard traps, and ensuring thorough mechanical inspections from day one, you can protect your vehicle, minimize out-of-pocket costs, and get back on the road safely and efficiently.
Phase 1: Securing the Scene and Coordinating Transport
The decisions you make in the first fifteen minutes after an impact dictate both your personal safety and the accuracy of your insurance claim. Before worrying about repair timelines, you must secure the immediate area, document physical evidence, and ensure your vehicle is moved using equipment that prevents secondary structural damage.
Your absolute priority is protecting yourself and your passengers from oncoming traffic. Secondary collisions at crash scenes occur frequently when drivers remain standing in active travel lanes or fail to signal hazards to approaching motorists.
-
Move to Safety: If the vehicle is drivable, carefully pull onto the shoulder or into a nearby parking lot. If the vehicle is immobilized, turn on your hazard lights immediately, turn off the engine, and exit the car if you can safely reach a barrier or grassy embankment.
-
Deploy Warning Signals: Set up reflective triangles or emergency flares 50 to 100 feet behind your vehicle to alert oncoming drivers, especially in low-visibility or nighttime conditions.
-
Document Scene Evidence: Before the vehicle is moved or loaded onto a transport truck, take clear photographs of the entire scene. Capture skid marks, debris fields, traffic signs, weather conditions, and the exact positions of all involved vehicles from multiple angles.
-
Inspect Fluid Spills: Photograph fluid trails underneath your vehicle. Differentiating between engine oil, transmission fluid, coolant, and brake fluid helps body shop technicians identify mechanical damage immediately during intake.
Selecting the Right Transport Equipment
Once the police have completed their initial report and the scene is cleared, moving an immobilized vehicle requires specific equipment. Dragging a collision-damaged car onto a hook-and-chain truck can twist the subframe, destroy all-wheel-drive transfer cases, and rip away bumper assemblies.
Utilizing professional towing services ensures that trained operators load your vehicle using flatbed rollback carriers, wheel-lift dollies, and soft-strap tie-downs. Flatbed carriers keep all four wheels off the pavement, eliminating drivetrain drag and protecting compromised suspension components during transit.
When accidents happen outside standard business hours, securing a reliable 24 hour tow truck prevents your vehicle from sitting abandoned on a hazardous shoulder. Prompt, off-hours transport protects your car from vandalism, weather exposure, and municipal impoundment, keeping the intake process moving smoothly.
Protect your vehicle during roadside recovery with these practical steps:
-
Demand a Flatbed Carrier for AWD and EVs: If your vehicle features all-wheel drive, an electric drivetrain, or low ground clearance, insist on a flatbed rollback truck to avoid damaging drive motors or transfer cases.
-
Photograph Underside Components: Take a quick photo of your wheels, tires, and lower bumpers while the vehicle is sitting on the ground before the operator hooks up winching cables.
Phase 2: Managing Emergency Removal and Facility Dispatch
In the confusion following a collision, law enforcement officers often call rotational transport operators to clear the roadway quickly. While clearing traffic is essential for public safety, accepting a non-consensual tow without verifying the destination can lead to administrative holds, long transport distances, and excessive fees.
When police dispatch a rotational operator, the driver’s primary goal is clearing the lane, not protecting your vehicle’s repair timeline. These operators often haul cars directly to municipal impound yards that charge high daily storage fees.
As a vehicle owner, you have the legal right in most jurisdictions to specify where your car is taken, provided your chosen operator can arrive within a reasonable timeframe set by law enforcement. Exercising this right prevents your car from being taken to an off-site holding lot, saving time and money.
Handling Critical Roadside Recovery Situations
Severe collisions involving roll-overs, off-road ditch landings, or sheared axles require specialized winching and recovery techniques to extract the vehicle without causing additional body damage.
Calling certified emergency towing operators guarantees that technicians use proper snatch blocks, spreader bars, and synthetic winching lines. Correct recovery protocols distribute pulling forces across reinforced frame points rather than fragile suspension arms or body panels.
Choosing an established local tow truck company ensures your driver knows local shop schedules, intake procedures, and insurance drop-off protocols. Local drivers can often deliver your vehicle directly to an active body shop’s intake lane, bypassing holding yards entirely.
Keep these practical strategies in mind before authorizing transport:
-
Never Sign a Blank Dispatch Slip: Verify that the towing agreement includes a clear itemized breakdown of hookup fees, mileage rates, and the exact physical address of your chosen body shop before signing.
-
Get a Direct Receipt: Obtain a physical or digital receipt from the tow driver that includes their operator license number, truck ID, and direct contact details for tracking.
Phase 3: Mitigating Secondary Storage Risks and Holding Costs
One of the most common causes of post-collision repair delays occurs when a vehicle sits in a temporary storage yard while insurance adjusters, transport drivers, and body shops process paperwork. Everyday a car spends in a holding yard is a day lost on the repair timeline.
Impound and holding yards charge daily storage rates that can quickly add up. If a dispute arises between your insurance carrier and the holding yard regarding fee limits, the yard may place an administrative hold on the car, refusing to release it until the bill is settled.
While the vehicle sits in an open yard, environmental exposure introduces secondary damage. Cracked windshields, sprung doors, and crushed hoods allow rainwater to seep into the interior, soaking carpets and damaging electronics.
-
Protect Open Seams: Require the storage facility or transport driver to apply heavy-duty, adhesive-backed plastic collision wrap over broken glass, sprung sunroofs, and crushed door frames.
-
Prevent Interior Mold: Water intrusion can create mold inside the cabin within 48 hours, often causing insurance companies to declare an otherwise repairable car a total loss due to biohazard concerns.
-
Authorize Immediate Release: Contact your insurance claims adjuster within hours of the accident to sign a digital vehicle release form, giving permission to move the car to your chosen repair facility immediately.
Managing Large-Format and Specialized Vehicles
Standard auto body shops lack the physical space, ceiling height, and specialized frame-stretching equipment required to repair large recreational vehicles, commercial vans, or overland rigs.
If your collision involves a motorhome, camper, or heavy trailer, partnering with a certified rv repair company from day one prevents costly secondary transfers. Specialized facilities feature high-clearance paint booths, heavy-duty floor lifts, and technicians trained in composite wall framing and onboard plumbing systems.
Securing a spot at a dedicated facility that offers secure vehicle storage ensures your car remains protected from weather and theft while waiting for insurance teardown authorizations.
Prevent holding yard delays with these proactive steps:
-
Inspect the Vehicle in Storage Personally: If your car must spend a night in an impound lot, visit the yard the next morning to confirm that all broken windows are sealed with waterproof film and that personal valuables are removed.
-
Request a Direct Shop Transfer: Instruct your insurance adjuster to schedule a direct flatbed transfer from the storage yard to the body shop within 24 hours of filing the claim.
Phase 4: Evaluating Tire, Wheel, and Chassis Damage
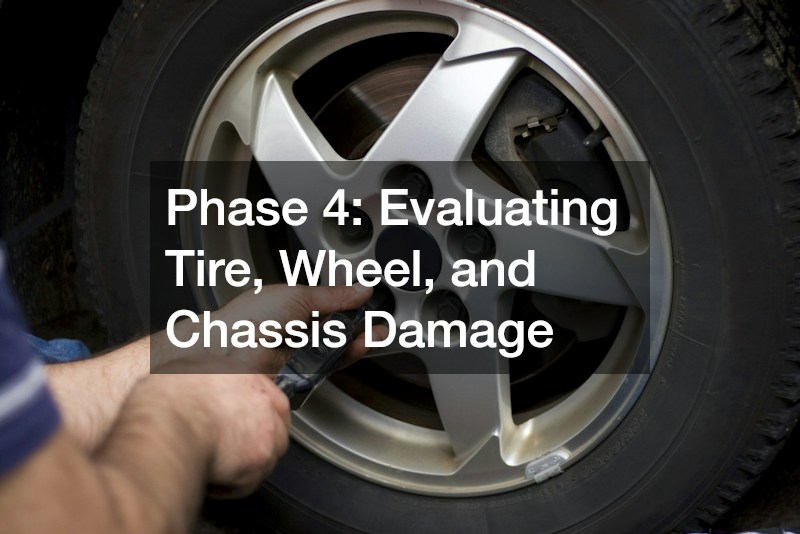
Impact forces from a collision do not stop at the outer plastic bumpers and metal fenders. Kinetic energy travels directly through the wheel assemblies, steering knuckles, and control arms into the subframe and unibody structure. Ignoring wheel and suspension damage early in the process leads to major repair delays later.
Even a low-speed side impact or curb clip can bend internal suspension components, crack aluminum wheel rims, or shear steering rack mountings. If these issues are missed during initial insurance estimates, they will be discovered weeks later during final wheel alignment, forcing the shop to submit supplemental parts requests that stall delivery.
-
Wheel Rim Cracks: Aluminum alloy wheels frequently develop micro-cracks along the inner rim barrel during an impact. These cracks cause slow air leaks and can lead to sudden wheel failure if left unaddressed.
-
Bent Struts and Control Arms: Structural suspension components are designed to deform under impact to absorb energy. A bent control arm throws off wheel geometry, causing severe tire wear and unstable handling.
-
Steering Rack Damage: Impacts transmitted through the front tires can chip internal rack-and-pinion teeth or damage power steering assist motors, requiring complete assembly replacement.
Addressing Rubber and Wheel Assemblies Post-Impact
Tires absorb the primary impact during a collision. Internal tire belts can break or separate even if the outer rubber shows no immediate cuts or punctures.
Inspecting your auto tires for sidewall bulges, tread distortion, or sudden pressure loss helps identify structural tire damage before the car goes back on the road. A bulge in the sidewall indicates that the inner fabric cords have snapped, making the tire unsafe to drive on.
Executing a timely tire replacement during the initial body teardown prevents unexpected delays during final road testing. When replacing tires on all-wheel-drive vehicles, ensure the new tire’s tread depth matches the remaining tires within manufacturer tolerances (typically within 2/32 of an inch) to avoid damaging the transfer case.
Ensure your suspension and wheels are properly evaluated with these steps:
-
Request an Immediate Alignment Check: Ask the body shop to perform a digital four-wheel alignment check during the initial teardown to identify bent structural suspension parts right away.
-
Check Inflation Pressures Across All Four Tires: Check the air pressure in all four tires after an impact; a sudden drop in pressure on an unimpacted side indicates that impact forces flexed the chassis.
Phase 5: Streamlining High-End Intake and Teardown Protocols
Modern vehicles are complex machines equipped with high-strength steel alloys, lightweight aluminum panels, carbon fiber composites, and Advanced Driver Assistance Systems (ADAS). Repairing these advanced vehicles requires specialized tooling, clean-room environments, and precise calibration procedures.
Vehicles equipped with radar modules, cameras, ultrasonic sensors, and blind-spot monitors require specialized care after a crash. A misaligned bumper bracket or improperly applied paint layer can disrupt sensor fields, rendering safety features like automatic emergency braking or lane-keep assist useless.
Comprehensive collision repairs must combine traditional metal straightening and paint refinishing with complete electronic system scans and sensor recalibration.
-
Pre-Repair Diagnostic Scans: Technicians connect factory diagnostic tools to read hidden fault codes across all onboard computer modules, identifying electronic failures caused by the crash.
-
Blueprint Teardown: Rather than writing a visual estimate from the outside, the shop completely disassembles the damaged area down to the bare frame to identify broken internal brackets, pinched wiring harnesses, and structural unibody misalignments early.
-
ADAS Recalibration: Sensors must be calibrated using specialized target boards and laser alignment systems to ensure safety features function according to factory specifications.
Selecting Certified Specialized Repair Facilities
Not all auto body shops are equipped to handle modern structural aluminum bonding, high-voltage electric vehicle systems, or complex radar calibrations.
Selecting a shop experienced in luxury auto repairs guarantees access to factory-trained technicians, OEM repair procedures, and specialized tools, such as clean-room aluminum welding bays and dedicated frame benches.
Choosing a certified facility prevents scenarios where a general body shop finishes the cosmetic work, only to discover weeks later that they cannot calibrate the vehicle’s safety electronics, forcing an additional delay while the car is towed to a dealership.
Streamline the teardown phase with these practical directives:
-
Authorize a Complete Blueprint Teardown Immediately: Give your repair shop permission to disassemble damaged body sections right away so all necessary parts can be ordered in a single initial estimate.
-
Confirm Sensor Calibration Capabilities: Ask the shop manager if they perform ADAS sensor recalibrations in-house or if they partner with certified brand dealerships to complete electronic safety checks before delivery.
Minimizing repair delays after a collision depends on the actions you take immediately following the impact. By managing scene safety, overseeing specialized flatbed transport, avoiding holding yard traps, and ensuring thorough suspension and electronic inspections from day one, you keep your repair moving forward smoothly.
Proactively taking control of the post-crash process protects your financial investment, reduces repair stress, and prevents unexpected out-of-pocket costs. An experienced, certified repair shop and a reliable transport team are your best partners in navigating insurance claims and technical repairs successfully.
Keep a post-collision checklist, emergency transport numbers, and your insurance policy information stored in your glovebox or smartphone. Being prepared allows you to handle crash-site logistics calmly and confidently, ensuring your vehicle is restored to factory safety standards as quickly as possible.
About the Author